Foodbuzz Banner

Find What You're Looking For

Showing posts with label keeper. Show all posts

Wednesday, February 23, 2011

Pirohi


Also known as pierogi, can come in several varieties such as prune, cheese, cabbage, sauerkraut and pretty much whatever you can dream up and stuff inside. With spring approaching, we are preparing to enter the Lenten season. This means abstinence from any meat products on Fridays each week.


I used to think of this as such a big, huge, sucky deal. Now that we have one meatless meal per week in our menu, it's just a matter of rotating the days and having meatless Fridays instead. It has actually become - dare I say it, fun - to look for and cook meatless recipes. The stigma that I used to hold for such types of meals has been absolutely blown out of the water and you definitely can have a very filling meal that contains no meat. 


I have always loved pierogi. It wasn't until college that I learned how to properly make them. Have you ever had a boiled pierogi? Ick. When I moved home, I brought my new cooking method with me and it spread like wildfire in my family. This is my first attempt at homemade. I attempted the potato variety. I added caramelized onion and cheddar cheese to the potato and filled each shell. It was surprisingly easier than I expected. 


Ingredients
2 c flour
2 eggs
1/2 tsp salt
3/4 c of warm water
1 tbsp butter
1 potato, mashed
1 small onion, diced
handful of cheddar cheese


Directions
Mix flour, eggs, and salt. Add enough warm water to make medium soft dough. Knead until blisters appear. Divide into two portions. Roll out one portion on a floured board. Cut into two inch circles or squares.


In a small pan, melt butter and add onion. Allow to cook until caramelized. Add 1/4 tsp salt, potato, and cheese to onion. Heat through until cheese melts. Take off of heat.


Place teaspoon of filling in each. Fold in half. Pinch edges to keep filling from escaping which can be done with the tines of a fork. Drop into boiling water until pirohi comes to top, about 10 minutes. After they are boiled and drained, crisp dough with a tablespoon of butter.


Source: Culinary Delights, St. Maurice Parish and Friends

Friday, February 18, 2011

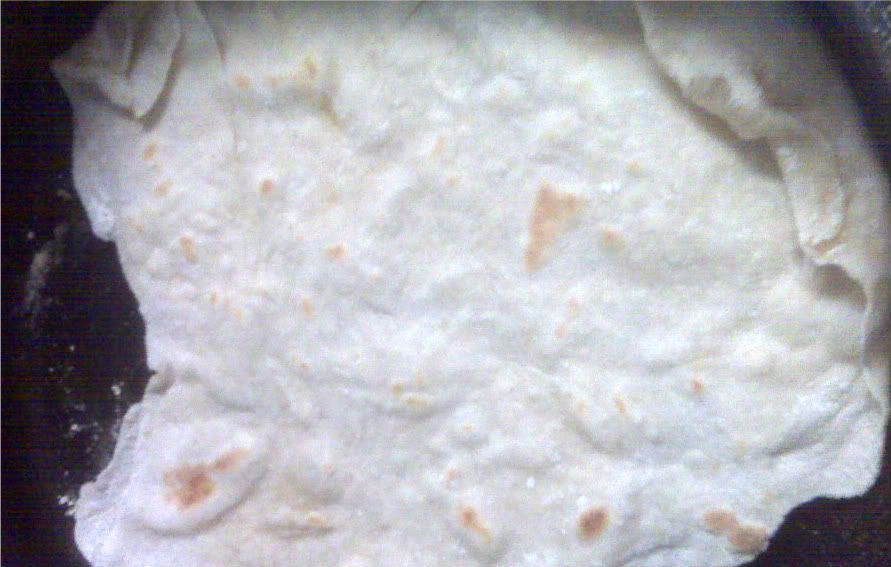
Homemade Tortillas


I take pride in making as many homemade things I can. Sure, you can easily go to the store and get a 99 cent pack of tortillas that were machine made and packaged. Call me a control freak, but I like knowing what I'm eating. I have already said how I tried one tutorial and it did not work at all. I had given up for awhile and continued buying the store brand. 


Then, I found this recipe. It was quick, simple, and tortillas were the final product. They are a bit reminiscent of my days at Taco Bell and these are a mix of the soft taco and flat bread shells. I always, always make a double batch to make them big enough for wrapped up sandwiches. A batch and a half yields about 5 or 6 decently sized tortillas. One of the things that I love best about this recipe is the amount of time needed. From beginning to end, I had these done, dinner cooked, and on the table in 30 minutes.  


Ingredients: 
2 cups all purpose flour
Pinch of salt
3 tablespoons olive oil
1/2 cup to 2/3 cup warm water


Directions: 

Place the flour and salt in a food processor. Pulse to combine. Add the olive oil, and blend.Gradually add the water to the flour mixture just until a stiff dough is formed. (The amount of water you need will vary.)
Transfer the dough to a floured surface, and knead until smooth. Cover the dough with a damp cloth. Divide the dough into 8 pieces. Knead each piece for a few minutes, and form into balls. On a surface dusted with flour, flatten and roll out each ball into a 9-inch circle.
Heat an ungreased heavy-based pan, like a cast-iron skillet. Cook 1 tortilla at a time, about 30 seconds on each side. Place the cooked tortillas on a baking sheet lined with paper towels.

Thursday, February 17, 2011

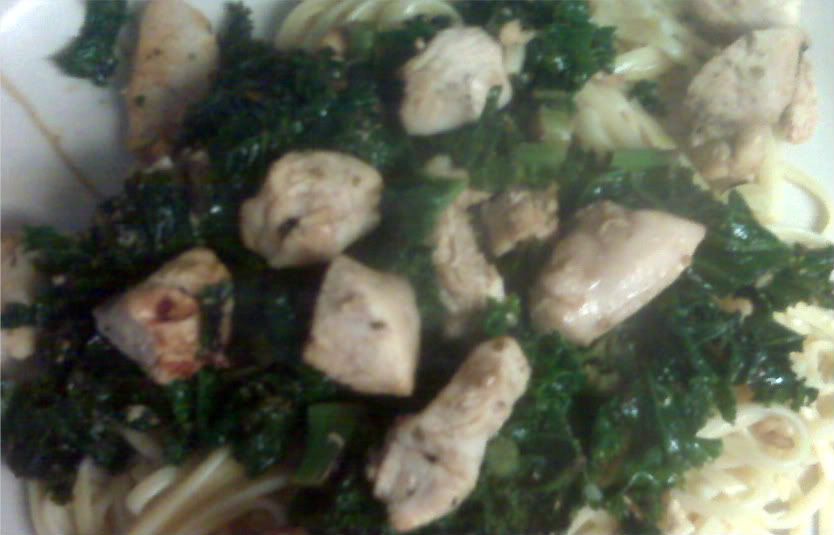
Roasted Chicken with Kale

The mantra of this website is navigating life with picky eaters, one recipe at a time. Perhaps I should swap the word picky with the word inexperienced. The fun part about having inexperienced eaters is the fact that very few risks and new things have been tried. I saw this as a negative for the longest of times. It seemed like a curse to have to make such drab meals. For instance, browning ground beef, adding two cans of vegetable soup, and popping some mashed potato flakes in the microwave. Yeah, I used to make that. 


One of the biggest joys of this blogging experience so far as been the fact that I have started making weekly meal plans and sticking to them. It has become weekend routine to sit down with the cookbooks, flip through the pages, and find new recipes to try that week. I try to keep things balanced and plan one beef, chicken, meatless, and Italian meal per week. I like to throw a soup in there too, most times on the weekends as they freeze well and make for great meals in a pinch. 

When flipping through Giada's Family Dinners, Fettuccine with Roasted Chicken and Broccoli Rabe was chosen. My mouth may have dropped when I saw what he chose. Broccoli rabe, really? Even though I was hesitant, I added it to the menu. I had to adapt the recipe slightly as I could not find broccoli rabe anywhere, but found kale instead. I also did not use fettuccine as I am trying to clean out my pantry and had other pastas. I used Bobby Flay's preparation for the kale and tossed it with the chicken and fettuccine. A surprisingly delicious combination that was a big winner for my inexperienced eaters.


Ingredients
1 pound kale, stems and leaves coarsely chopped3 tablespoons olive oil
2 cloves garlic, finely sliced
1/2 cup vegetable stock or water2 tablespoons red wine vinegar1 pound pasta1 (14-ounce) can reduced-sodium chicken broth1/4 cup fresh lemon juice3 cups shredded roasted chicken (from 1 roasted chicken)3/4 cup freshly grated Parmesan2 tablespoons chopped fresh parsley leavesSalt and freshly ground black pepper

Directions

Bring a large pot of salted water to a boil. Add the pasta to the same pot of boiling water and cook until just tender, about 2 minutes. Drain, reserving 1/2 cup of cooking liquid.

Heat 3 tablespoons olive oil in a large saucepan over medium-high heat. Add the garlic and cook until soft, but not colored. Raise heat to high, add the stock and kale and toss to combine. Cover and cook for 5 minutes. Remove cover and continue to cook, stirring until all the liquid has evaporated. Season with salt and pepper to taste and add vinegar.


In a second skillet, bring the broth and lemon juice to a boil over medium-high heat. Boil until the broth reduces by half, about 5 minutes. Add the chicken and simmer just until heated through, about 2 minutes. Add kale to the chicken broth and stir to combine. 
Add the pasta, 1/2 cup of Parmesan and parsley. Toss to coat, adding some of the reserved cooking liquid, 1/4 cup at a time, to moisten. Season the pasta with salt and pepper, to taste. Mound the pasta into bowls and serve. Sprinkle with the remaining Parmesan and serve.
Source: Adapted from Family Dinners and Bobby Flay

Tuesday, January 18, 2011

German Pancake


When the alarm went off today, I jumped into the shower and started getting lunches together for the day. In the span of about twenty minutes, it went from normal days for all of us to a two hour delay schedule for me and a sick day for Dan. Having some time before DJ got up, I decided to throw this together and put it in the fridge so Dan would have something easy and quick to fill his tummy when he actually pried himself out from the cover cocoon. I've seen more dressed up versions of this recipe, but the recipe that I used was just three ingredients: eggs, flour, and milk.

As you can see from the picture, DJ loved this huge pancake as well. Melt a little bit of butter, add a sprinkle of confectioner's sugar, grab the maple syrup (and a fork) and you're good to go. A nice, filling breakfast for a day when you don't have to do much at all (except go into carb overload.)

Ingredients
3 eggs
1/2 cup milk, room temperature
1/2 cup sifted bread flour or all-purpose flour

1 tablespoon butter, melted
confectioner's sugar, for dusting

DirectionsPreheat oven to 450 degrees F. Place oven rack on the middle rack of your oven.

Place a large, heavy ovenproof frying pan or skillet in the oven until hot. While pan is heating, prepare your batter.

Mix eggs, milk, and flour in bowl. When combined, pour into hot pan or skillet. Bake at 450 degrees for twenty minutes.

Source: 1,001 Inexpensive, Quick Recipes

Monday, January 17, 2011

Banana Applesauce Oat muffins

 
Well, here we are. The start of another week. Last time I asked my husband what was for breakfast, he answered (without hesitation) that he wanted cheese danish. This week was not as fortunate, as I received the shoulder shrug and head tilt, which means I don't know and I don't feel like thinking about it right now. I looked in the kitchen and found bananas that were beyond ripe and really should have been thrown out if I didn't do something with them. So over the internet I searched, and found these muffins from So Tasty, So Yummy.

I know that I usually wait to see Dan's reaction before I say whether it's a keeper or not, but seeing as how I made a dozen and only have six left in the fridge, I am going to say keeper! 

Ingredients  
1 egg
3 mashed ripe bananas
3/4 cup packed brown sugar
1/3 cup natural applesauce
1 teaspoon vanilla extract
2/3 cup all-purpose flour
1/3 cup whole wheat flour
1/2 teaspoon baking soda
2 teaspoons baking powder
1 1/4 teaspoons salt
1 teaspoon cinnamon
1 cup quick cooking oats

Directions:
Preheat the oven to 350 degrees. Line a 12 cup muffin pan with paper liners.
 
In a large bowl, combine egg, bananas, brown sugar, applesauce and vanilla. In a separate bowl, sift together the flours, baking soda, baking powder, salt and cinnamon. Stir the oatmeal into the flour mixture. Gently stir flour mixture into the banana mixture.  Pour batter into the prepared muffin cups.

Bake in preheated oven for 25 minutes. Remove muffins from pan and place on a wire rack to let cool before serving. 

Source:  adapted from So Tasty, So Yummy

Thursday, January 13, 2011

Chili's Southwestern Vegetable Soup

I have to admit something: I love one of the cookbooks that I received for Christmas. Being able to make food that can be found in restaurants is a wonderful alternative to going out to eat all the time. It makes me feel great to be able to give my family a delicious meal that I know exactly what went into it and it didn't cost an arm and a leg. This book has not failed me yet. Ok, so I've only made two recipes from it so far, only time will tell I guess. 


Southwestern Vegetable soup is something that stuck out to me from the first time that I read the recipe. I love veggies, as does my son. He will eat every single veggie on his plate, followed by fruit, then bread, and finish up with the meat that is on his plate. I was worried about the amount of chili powder in this recipe, as we don't eat "spicy" things. Spicy things + members of my family does not equal a winning situation. The flavor that the chili powder gave was perfect. The vegetables were a great combination. I adapted the recipe a bit by sauteing the onion and green pepper in a skillet before adding them to soup. I have adapted the recipe to show the slight change that I made. 


Chili’s Southwestern Vegetable Soup

6 cups chicken broth
1 can diced tomatoes
1 cup water
1 cup canned dark red kidney beans
1 cup corn kernels
1 cup green beans
1 diced green pepper
½ cup diced onion
½ cup tomato sauce
1 ½ teaspoons chili powder
Pinch of garlic powder

Directions
1.) Mix the soup ingredients in a pot over high heat.
2.) Bring the soup to a boil, reduce heat, and let simmer for 45 minutes.
3.) Serve into soup bowls and garnish with cheese as desired. 

Source: America's Most Wanted Recipes


Wednesday, January 12, 2011

Cocoa Fudge Cookies

Yay! Snow day! One of the perks of being a teacher. The students think that they are the most excited for a day off...heck no, the teachers are. Another perk of being a teacher is getting all kinds of cute mugs and little plates to put goodies on. 

Speaking of goodies, I really like these cookies. I have to be honest that I wanted to make chocolate chip cookies, but don't have any chocolate chips in my pantry. Since getting my oven which actually preheats and cooks the way it should, I have been on a real baking kick. After a little search on Google, I found these cookies. I read through the recipe and saw yogurt. Yogurt? In a cookie? Are you serious? Oh boy...this could be horrible. Let's try it. My actual thinking would be that the recipe would make an interesting trainwreck for the blog. The complete opposite of my original opinion is true. They are crunchy on the outside but have a moist, tender inside. Delicious. I can't wait to see what Dan thinks of them when he gets home today. They would be perfect for dunking into milk, coffee, tea, or hot chocolate.

 Ingredients
  • 1  cup  all-purpose flour
  • 1/4  teaspoon  baking soda
  • 1/8  teaspoon  salt
  • 5  tablespoons  butter
  • 7  tablespoons  unsweetened cocoa
  • 2/3  cup  granulated sugar
  • 1/3  cup  packed brown sugar
  • 1/3  cup  plain low-fat yogurt
  • 1  teaspoon  vanilla extract
  • Cooking spray

Directions
Preheat oven to 350°.

Lightly spoon flour into a dry measuring cup; level with a knife. Combine flour, soda, and salt; set aside. Melt butter in a large saucepan over medium heat. Remove from heat; stir in cocoa powder and sugars (mixture will resemble coarse sand). Add yogurt and vanilla, stirring to combine. Add flour mixture, stirring until moist. Drop by level tablespoons 2 inches apart onto baking sheets coated with cooking spray.
Bake at 350° for 8 to 10 minutes or until almost set. Cool on pans 2 to 3 minutes or until firm. Remove cookies from pans; cool on wire racks.

Source: Cooking Light, via MyRecipes.com

Chicken Cacciatore


Yesterday was my second day of sticking to a meal plan. Chicken was on the menu in the form of chicken cacciatore. Now, because my picky eaters do not like mushroom, I sliced the mushroom and added it at the end, just before serving. This was absolutely delicious. The chicken was tender, and the sauce was absolutely perfect. I have so very many cookbooks that I am trying to only pull one recipe at a time and rotate my books. It will take me a VERY long time to get through it all, so I hope you're all buckled in for a long ride! This recipe came from Better Homes and Gardens 15th edition Cookbook. I am the proud owner of not one, but two of these books. I find it very funny that even though Dan and my sister went shopping together for my Christmas presents, they ended up getting me the same exact gift. Keeper of a recipe.

Ooh..and an update on the cheese danish: Survey says keeper, but halve the amount of lemon zest that is added to the filling. The lemon, I was told, is a bit overpowering. He's already having trouble thinking of what next week's breakfast choice will be.


Chicken Cacciatore (Cooking with Flavor)

Ingredients
½ teaspoon salt
3/8 teaspoon Ground Black Pepper
1 pound boneless skinless chicken breasts, cut into 1 inch cubes
3 tablespoons olive oil, divided
1 package sliced mushrooms
1 medium onion, coarsely chopped (approximately 1 cup)
1 teaspoon garlic powder
2 cans diced tomatoes, with juices
1 can tomato paste
3/4 cup chicken broth
1 ½ teaspoons Italian Seasoning

Directions
1.) Coat chicken evenly with salt and pepper.
2.) Heat 2 tablespoons of the oil in large skillet on medium-high heat. Add chicken; cook and stir 5 minutes or until lightly browned. Remove chicken from skillet.
3.) Add remaining 1 tablespoon oil to skillet. Add onion and garlic (add the mushrooms during this step as well if you wish, I added later). Cook and stir five minutes on medium heat or until vegetables are tender.
4.) Stir in tomatoes, tomato paste, chicken broth, and Italian seasoning. Bring to boil, stirring frequently. Return chicken to skillet. Add mushrooms and reduce heat to low; cover and simmer 5 minutes or until chicken is heated through.
5.) Serve over pasta or rice, if desired.

Source: Better Homes and Gardens 15th edition cookbook

Friday, January 7, 2011

Bacon Wrapped Breadsticks

If my husband were able to marry a food, it would without a doubt be anything Italian. He loves Italian food. Spaghetti, lasagna, you name it...he'll devour it. When it comes to our preference in foods, my husband and I are complete opposites. I really don't like Italian food. I blame it on years of pre-packaged (nasty tasting) Italian "meals". Being the good wife and mother that I am, I plan one night each week that has an Italian dish. I will actually eat a little bit of whatever I make, but usually end up taking the sauce and soaking it up with breadsticks. Enter these delicious little things. I saw these on Food Network, and I love (be sure to say it with a southern accent) Pah-la Deen so I knew that these breadsticks have to be fantastic. I actually have cousins that live in the vicinity of the Paula Deen house and restaurant. I always threaten that I am going to come down and we are going to dinner there, but it never ends up happening.

These breadsticks are fluffy and delicious. The combination of the salty bacon and the garlic salted cheese is wonderful. Be sure to try these with any soup, salad, pasta, or even by themselves. You won't be disappointed.

Ingredients

  • 1 cup grated Parmesan
  • 2 teaspoons garlic salt or powder
  • 12 slices bacon
  • 24 (4 1/2-inch) long sesame breadsticks (1 package)

Directions

Preheat oven to 350 degrees F.

In a mixing bowl, combine the Parmesan with garlic salt and set aside. Cut the bacon slices in half so they are approximately 5-inches long. Wrap each bread stick with 1 slice of bacon, starting at 1 end and ending at the other. Place wrapped bread sticks on a cookie sheet lined with parchment paper, and bake for 15 minutes or until bacon is browned. Remove from oven and immediately roll bread sticks in cheese mixture. Let cool and serve at room temperature.

Source: Paula Deen, Food Network

Monday, January 3, 2011

Sweet and Sour Sauce

Good morning! Now that we are back to school, my posts will be coming earlier in the morning. I hope that everyone had a wonderful New Year. Now, on to the food.

I love fast food and take out. It's really too bad that my budget won't allow for such things anymore. So when I can find a recipe that takes like, or even better, than the take out I've learned to love, it's a bonus to be able to make it at home. While searching for a recipe for the massive amounts of pork that I cooked on  New Years, I found this little gem. Recreating sweet and sour sauce has been one tough battle in my household. It's either too sweet or too sour, but never the perfect blend...until now. This source also has a recipe for frying the pork, but I took the heathlier route and used a pork loin that I had simmering in the crock pot all day. This sauce was absolutely perfect. Just the perfect blend of sweet and sour, and just enough to cover the meat so that it is not overpowering. Try it and I promise, you won't be disappointed. The best part of this recipe is the adaptability. It would taste wonderful with chicken, beef, and shrimp.


Ingredients:
1 1/2 tablespoons tomato ketchup
1 teaspoon plum sauce
1/8 teaspoon Chinese rice vinegar (transparent in color)
1/2 teaspoon Lea & Perrins Worcestershire Sauce
1 teaspoon oyster sauce
1 teaspoon corn starch
1 teaspoon sugar
2 tablespoons water

Directions:
1.) Mix the sweet and sour sauce ingredients well and set aside.
2.) Heat up a wok and add in some cooking oil.
3.) Add in the chopped garlic and stir fry until light brown, then follow by the bell peppers and pineapple pieces.
4.) Stir fry until you smell the peppery aroma from the peppers and then add in the sweet and sour sauce.
5.) As soon as the sauce thickenens, transfer the pork into the wok and stir well with the sauce.
Source: Rasa Malaysia

Friday, December 31, 2010

Honey Wheat Brushman Bread


When Dan and I first started dating, we celebrated every little event by going out to dinner. Now that we lived through job loss and tough times, we are very conservative with how we spend our money. We save going out to dinner for the occassional date night when DJ goes to his Nana's house and we get the chance to go to dinner and see a movie. I knew that I wanted to celebrate Dan's last day of work until the New Year, but going out to dinner just isn't in our budget after Christmas. I received America's Most Wanted Recipes for Christmas and knew that it was the perfect opportunity. After doing some flipping of pages, I found a recipe for Outback's honey wheat brushman bread. It was absolutely fabulous. Enjoy! The recipe makes a ton of bread. I was able to get two loaves of it and am so glad that I have a whole one left! 

Ingredients
1 ½ cup warm water
½ cup honey
2 ¼ teaspoon (1 envelope) active dry yeast
1 tablespoon sugar
2 tablespoons butter, softened
2 cups bread flour, plus extra
2 cups whole wheat flour
1 tablespoon cocoa powder
2 teaspoons instant coffee powder
1 teaspoon salt
3 tablespoons cornmeal, for dusting
whipped butter, for serving

Directions
(If you have a bread machine, place all ingredients in bread machine except cornmeal and whipped butter and let the machine work its magic and skip to step number 3.)
1.) Combine water, honey, sugar, and yeast into bowl. Stir to combine and allow yeast to activate for 5 to 10 minutes.
2.) Combine butter, flours, cocoa powder, coffee powder, and salt. Combine all ingredients together until dough becomes tacky, but not sticky, approximately 8 to 10 minutes.
3.) Let dough rise for one hour.
4.) Punch down and divide into up to eight portions.
5.) Sprinkle with cornmeal. Cover with plastic wrap and allow to rise for another hour.
6.) Preheat oven to 350 degrees.
7.) Bake for 20 to 25 minutes. Bread is done when it reads 210 degrees on an instant read thermometer placed into the center of the bread.
8.) Serve warm with whipped butter.

Source: adapted from America’s Most Wanted Recipes, 2009.

Thursday, December 30, 2010

Beef Veggie Skillet Soup and Puppy Love


Remember the Sweet Potato Skillet a few nights ago that was a disaster? I was worried about last night's dinner because it came from the same exact cookbook. I get the whole try, try again theory when something doesn't work, but I was cautious and even thought about changing to something different. As I looked at the recipe, parts of it just didn't seem to make sense to me. I questioned my instincts, but as I cooked, I decided to trust my instincts and change the recipe. I am VERY glad that I did. The recipe that follows contains my adapted version. I wanted something to go along side it - something to soak up all the liquid. I knew exactly the recipe, soft garlic knots, and it came from none other than Annie's Eats. I love Annie's blog. I could sit and read it for hours - I may have done that before. The rolls definitely did not disappoint and Annie's step by step directions were great. 

Now for the good cause behind this soup which by lucky coincidence was already planned.   Branny Boils Over is holding a Charity Souper Bowl that benefits the ASPCA. For every soup recipe that is entered, she will donate a dollar. And how could you look at this face...

and not do something that benefits animals? This is Duke. Duke is an English mastiff. We call him our Jamaica baby, because we were on our honeymoon when he was born. I have never had a dog before Duke - I figured I'd start out small...haha, right. Actually, it was a case of my husband missing dogs, us going to a local pet store to kill some time before a movie, and before we knew it we were seriously considering playing with one of them. We, or rather I, knew that if we went into the puppy play center, that it was done. We were going to own a dog. We never ended up seeing the movie that night. We had a new addition to the family to take care of. Having come from a family that only had fish, frogs, and a rabbit, I had no idea what was in store for me. The massive amounts of drool, the horribly loud snores, hours of training and buying several types of dog food because the spoiled thing will only eat dry food with wet food mixed in. I also didn't expect the loyalty, love, and protection that he provides. Here you go Duke, this one's for you, pal! 

Thank you, Branny for encouraging participation for this wonderful cause! 

Veggie Beef Skillet Soup

Ingredients
1 pound skillet steak
1 tablespoon olive oil
1 small onion, diced
4 celery stalks, washed and chopped
3 carrots, washed, peeled, and chopped
1 chopped green pepper
2 cups beef broth
1 can whole tomatoes with juices
1/3 cup ketchup
2 teaspoons Worcestershire sauce
2 teaspoons balsamic vinegar
1/4 cup parsley

Directions
1.) Brown steak in large skillet over medium-high heat, stirring to break up the meat. Set aside on plate. Add oil, chopped carrots, celery, and onions to skillet; stir and cook vegetables until soft and tender. 
2.) Add beef, broth, tomatoes, ketchup, Worcestershire sauce, vinegar and bring to boil. Reduce heat, cover and simmer for 20 minutes. Remove from heat; cover and let stand 5 minutes. Stir in parsley before serving. 

Source: Adapted from Fix It Quick, One Dish, soft garlic knots from Annie's Eats

Monday, December 27, 2010

BLT Roll-Ups

I would love, love, love to host a holiday party. However, with my craptastic stove, that is just not a possibility. When I asked my sister-in-law what I could bring to Christmas, she said to bring an appetizer. The first place that I went to was Annie's Eats. That's when I found these BLT roll-ups. They were perfect. The tomato and lettuce made for a wonderful, festive presentation. I did not include the ranch dressing, but they were great as is. The best part, they were gone in ten minutes flat. Hope that everyone had a wonderful Christmas!

BLT Roll-Ups
Ingredients:
3 8- or 9-inch flour tortillas
3 oz. cream cheese, softened
1-2 tbsp. Ranch dressing
6 pieces bacon, cooked and crumbled (I used turkey bacon)
1/2 cup shredded lettuce
1 large tomato, diced
Ranch dressing for dipping, if desired

Directions:
Lay all three tortillas out flat on a work surface. Combine the cream cheese and 1-2 tablespoons Ranch dressing in a small bowl and mix until smooth. Divide between the tortillas and spread in a thin, even layer over each. Sprinkle a third of the bacon, lettuce and tomato over each tortilla. Starting at one edge, roll each tortilla up tightly into a spiral shaped log. Slice each log into 1-inch sections, and serve with Ranch dressing for dipping, if desired.

Source: Annie's Eats, adapted from Chomping the Big Apple

Thursday, December 16, 2010

Apple Stuffed Chicken

When I read over this recipe while at my desk at work, I knew that I had to make this recipe. Something about it just called out to me. However, I was concerned about how the fruit would be received. After reading the reviews, I decided to adapt the recipe slightly by adding a tablespoon of brown sugar to both the stuffing and to the pan gravy. I didn't have any cornstarch, so I used a tablespoon of butter and flour to make a roux. It was absolutely delicious. I was hesitant to fess up about the stuffing, but of the four servings that it made, three of them ended up on Dan's plate and eaten. Winner, winner chicken dinner indeed. Definitely a (surprising) keeper! Feels good to start out with a win in my column.

Here's the recipe.

Ingredients:
2 skinless, boneless chicken breasts
1/2 cup chopped apple
2 tablespoons shredded Cheddar cheese
1 tablespoon Italian-style dried bread crumbs
1 tablespoon brown sugar
1 tablespoon butter
1/4 cup dry white wine (I subbed in chicken broth)
1/4 cup water
1 tablespoon butter
1 tablespoon brown sugar
1 tablespoon chopped fresh parsley, for garnish

Directions:
1.Combine apple, cheese, brown sugar, and bread crumbs. Set aside.
2. Flatten chicken breasts between sheets of waxed paper to 1/4 inch thickness. Divide apple mixture between chicken breasts, and roll up each breast. Secure with toothpicks.
3. Melt butter or margarine in a 7 inch skillet over medium heat. Brown stuffed chicken breasts. Add wine (I used chicken broth) and 1/4 cup water. Cover. Simmer for 15 to 20 minutes, or until chicken is no longer pink.
4. Transfer chicken to a serving platter. Combine 1 tablespoon butter and flour. Wisk for 5 minutes.
5. Add additional brown sugar and juices into pan. Cook and wisk until thickened. Pour gravy over chicken, and garnish with parsley. Serve.

Adapted from Behr, Allrecipes.com
http://allrecipes.com/Recipe/Apple-Stuffed-Chicken-Breast/Detail.aspx

Tuesday, December 14, 2010

Peanut Butter Crisscross Cookies

Wow, first post on the new blog. Hello! I am Lisa, a teacher who likes to cook and bake. My husband thinks that I am nuts because I am always going on websites looking for new and interesting recipes. Only one problem, I am up against a picky eater. A dish may look absolutely wonderful and make me drool just thinking about it, but if it's not man friendly or approved, I will find myself eating the leftovers for lunch and dinner for the next week. I look forward to sharing family recipes, newfound keepers, hilarious bloopers, and the occassional recipe gone horribly wrong.

Last night I made peanut butter crisscross cookies. Considering that the hubby only likes peanut butter if it is slathered in some type of jelly, these cookies flew off of the cooling rack rather quickly. Evidently, they go very well with a big glass of milk. The dirty cup in the sink told me so. I opted to leave the cup and a half of nuts out, as neither of us are big fans of nuts in cookies.

Here is the recipe.
Ingredients:
2 1/2 cups of flour
1 tsp baking soda
1/2 tsp baking powder
1/4 tsp salt
pinch of freshly grated nutmeg
2 sticks of unsalted butter- room temp
1 cup of peanut butter (creamy or crunchy)
1 cup light brown sugar
3/4 cup sugar
2 large eggs
1 1/2 cups salted peanuts
About 1/2 cup sugar for rolling

Directions
Position the racks to divide the oven into thirds and preheat the oven to 350 degrees. Line 2 baking sheets with parchment or silicone mats.Whisk together flour, baking soda, baking powder, salt and nutmeg.
Beat the butter on medium speed for a minute or two, until it is smooth and creamy. Add the peanut butter and beat another minute. Add the sugars and beat until blended, then add eggs one at a time.On low speed beat in dry ingredients, mixing a little at time until blended before adding more. Once blended, mix in chopped peanuts ( I opted to leave these out...again, picky eater). Pour the 1/2 cup sugar in a bowl.
Measure a level tablespoon of dough. You can also do the rustic thing and pinch some off with your fingers and roll it into a ball, which I did. Once you have a nice ball, drop it and roll it around in the sugar. Place it on the cookie sheet. Take a fork and press the fork against the ball of cookie dough in one direction and then again in a perpendicular direction, you should have a flat round cookie.

Bake for about 12 minutes.

Recipe from Babbs' Bites, originally from Dorie Greenspan
 
Blog Design by Delicious Design Studio